Monday, December 16, 2013

Stalking ebay

There has been a major void in my kitchen area.  I have cute little counter height bar area and no bar stools :(

Where are people to sit and chat with me while I slave away in the kitchen?

A few months ago, I found some amazing counter height chairs at St Vincent de Paul in LA, but they were $70!  Each!! They were just black vinyl bar chairs with tapered legs.  Cute, in a clunky way and very 70's.  I didn't see the big deal.  The tag said they had been there for almost a month.  I tried to talk the manager down and he actually budged to $85 for the set.  He said that obviously I knew what these chairs were (I did?) and that they would definitely be gone by tomorrow.  Naturally, I balked and refused to pay such an exorbitant, inflated price..... and then .....I couldn't stop thinking about them.  Aaand, sure enough, I went back the next day and they were gone!! wtf??  Who stole my chairs?

So, I searched ebay, etsy and craigslist and apparently they are kind of a big deal.  Here are a similar pair in orange vinyl for over $2,000?!? Which is totally insane, but kind of makes $85 seem more reasonable....


Gahh!  I hate when that happens!

So I search...for months on ebay, craigslist, thrift stores, even regular stores and ....nothing!  I want to kick myself every minute for not getting those awesome chairs!

And then, to make matters worse, I discover that counter height stools are way harder to find than regular bar height stools.  

Finally, I found a possible solution on ebay in brass (my favorite) and then I got sick and completely lost focus.  The auction ended and I forgot to bid!  

Luckily no one else did either and I contacted the seller and made a deal.  Not an awesome deal.  But I was so tired of looking and I did not want to see these chairs for $40,000 on etsy tomorrow so I bit the bullet and now I have new glamorous counter stools!

Tada!


So far I've cleaned up up the metal with window cleaner and my favorite thing the Mr. Clean Magic Eraser.  This thing works wonders on scuffs.  Have you tried it?  You must!

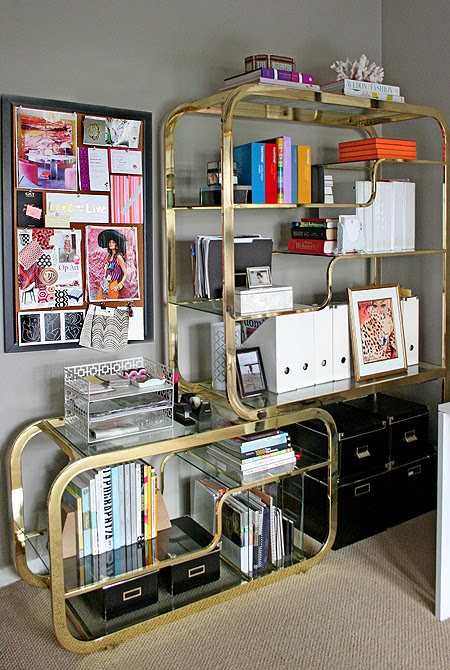
Next up is upholstery and this is my inspiration:


They are going to be amazing.  Stay tuned....

Faux Snow.

I love a good flocked wreath!  It's just so fun and wintery and kitcshy.  Especially in Southern California.  Over the years I tried various teqniques to get the effect I was looking for.  I tried the flocking that comes in a can.  Total flakey mess.  I tried cotton batting.  Too bunchy and webbish.

Then, last year, I googled "diy flocking" and came upon several posts that had a recipe using grated ivory soap and spray starch from a can.  I modified slightly using the following ingredients:

1 bar ivory soap, grated on the large holes on a box grater


1/2 cup spray starch. I used this kind:


1/4 cup hot tap water.

Put everything in a large bowl and mix using a hand mixer. 


Mix for a minute or two until you have something that resembles soft butter~like when you over mix whipping cream and it gets almost clumpy


 I decided to flock an old wreath I've had in storage that I spray flocked a few years ago.  It's perfectly good wreath, just a dusty mess from the spray.  I tapped off as much of the dust as possible and wiped it down with a towel and was left with a slightly sage colored wreath which I really liked.  Then I propped it up outside and started the dabbing of faux snow. 


 You definitely want to do this outdoors or on a large tarp because this part gets really messy.   Last year when I did this I was totally perplexed about how to go about creating realistic looking snow. After a few tries I found my 2 favorite techniques:


 Dabbing:


Patting:


Saturday, December 7, 2013

Monday, November 11, 2013

Stalking Craigslist


 Ever since I saw this brass shelf I have been obsessed with finding my own.  


  It's just so glamorous and versatile and I knew it would be perfect for the tall wall in the living room


So I found it on Craigslist for $40 !!!!!!!!!!!!! And I went a little bonkers.  I think I scared the seller with my over zealousness and maybe a couple of smiley face emoticons....and she flagged me as a scam.  I was crushed and honestly a bit insulted.  :( 

I wouldn't relent though.  I had a co-worker inquire about it and, once he got the seller's contact information he said his "wife" would contact them and arrange for the pick up.  I was in!

I wasted no time and immediately got in my car drove an hour and a half in rush hour traffic to pick it up and the sellers could not have been more lovely We laughed about the whole "flagging me as a scam" nonsense.  
Ahh Craigslist...


They were so nice they even helped me tie it to my car. 


And voila!  Curvy, shiny, beauty!  

 It's the perfect thing for that awkward corner.


Friday, November 1, 2013

Upholstered Bed Frame Part 2

 For a while I lived with the half finished frame.  I draped some fabric over the bare wood headboard and thought about fabric and tufting and how I was going to upholster the thing....Basically I just procrastinated and went shopping for other pieces for the room.


Good thing I did.  I totally scored on 2 $10 nightstands from a thrift store and repainted them in gloss white and then ... I found these incredible vintage sconces at Consign Design in Palm Desert.  But, once I hung them up, I knew that the headboard dimensions were off.  It was starting to  look a little dinky.  I need to bring it up at least 5 or 6 inches.


So I removed the headboard from the back of the base and stapled a layer of batting over the side rails and legs.  I built up any areas where there were gaps between the wood or where the legs were set slightly behind the frame to get a smooth, even surface for the fabric to lie against.  Naturally I forgot to take pictures of that step.  Oops!  You can kind of get the idea from below where I am measuring how long the 3 pieces of fabric need to be to cover the sides and foot.


Next, I cut 3 strips of fabric 16" wide by 86" long.  I wanted the seam to be at the corner of the legs so I sewed the left side to the back piece.  Then , I held it up to the side and back and marked where the right corner seam should go.  Then trimmed off the excess from the back piece and sewed that to the right side piece.  Once it was all sewn I stapled the back first then the 2 sides.  I tucked the fabric under the legs and then glued some felt pieces under the feet so the staples wouldn't scratch the floor.


I think it's looking pretty bad ass so far! 


Saturday, October 19, 2013

Tuesday, October 8, 2013

Upholstered Bed Frame Part 1


Here is a peek at the look I'm going for: 

 I love it so much.  It has everything going for it.  Great lines and classic details like button tufting.  

I've got a long way to go from where I started: A mattress and a wood frame box spring with a saggy cover.


This is what the box spring looks like with the cover removed.  I added feet to the corners and under the center for stability and some height.  

My plan was to cover the sides and legs with a layer of batting and then
upholster over that.  That turned out not to be a great idea since it didn't prop up the batting and fabric enough and it looked like it would dip between the supports.  This totally deflated my progress for a few months while I tried to figure out an easy, cheap solution.


My neighbor had some pegboard scraps and offered to cut them to to make the sides a bit more of a solid foundation for the upholstery.  It was the perfect solution.  And Free!


Come back soon and check out the progress!

Monday, September 9, 2013

Breakfast wrap


I love to make this yummy, healthy green egg and cheese breakfast wrap on days when I need to feel full and satisfied until way past lunch time.   This is so easy to make.  Takes just a couple of minutes and uses ingredients I almost always have on hand. 

Here’s what you need:

1 Ezekiel sprouted grain tortilla 
2 organic eggs
1 shallot- chopped
½ a ripe avocado
Cheese –any kind that melts nicely.   Goat, Havarti,  jack would all be tastey…
Big handful of greens (kale, spinach,  chard)- chopped 
Salt and pepper
Coconut oil or butter

Start with a little coconut oil or butter in a cast iron skillet (or any heavy skillet) and sauté a chopped shallot until translucent.   
 

Add a big handful of chopped kale or spinach about until wilted.  Kale will take a couple of minutes; spinach will be like 20 seconds.   

Add 2 eggs and a pinch of salt and pepper and stir it all up until the eggs are scrambled.  Turn off the heat, form the eggs into a log and and toss some shredded or thinly sliced cheese on top and cover. 


Meanwhile warm the tortilla in a toaster over for a minute until soft.  Mash ½ an avocado over the center of the tortilla.


Top with the egg/cheese/kale mixture and wrap 


.

Saturday, August 17, 2013

Sexy knobs

When I was in high school I worked at Ann Taylor where I learned about the importance of accessorizing.  It's huge people!  You can take the most blah top and with the right scarf or necklace all of the sudden it looks totally money.  


Same thing with hardware my friends!

I mean, we are dealing with pretty basic cabinetry here and formica counters ...bull nose, no less...and these vintage brass knobs (found on ebay) totally bring in the sassy.


Hubba hubba amirite?


The cool blue, white and grey color scheme just needed some gold to warm it up. 


Seriously, these knobs make me so giddy!

 I carried one in my purse for about 3 weeks while I was painting the kitchen and every once in a while I would just pull it out and let the weight of it sit in my hand while I admired the lovely golden brass hue of it. 

I'm not even kidding.

I may have also made everyone I know hold and admire the knobs too.

Possibly...


PS:  I LOVE BRASS!!


pps:  I love tequila!

 and this stuff is pretty drinkable and real cheap.


Why in the world would I post a photo of my messy cabinets insides?  Other than to remind myself (and now you) of good cheap tequila...

Perhaps, the same reason as why my final reveal photo has a bag of chips and some cheese on the counter.  Because I am a total blogging amateur.


There's still so much more to do in the kitchen so there is a chance I may redeem myself with a clear, well lit, clutter free final final reveal.

Anything is possible.