Saturday, June 29, 2013

Outside a da haus

 Ok here we are before any painting and scraping. The stucco is a mauvy pink (it looks peach in this light) and the trim is terra cotta colored.  I think it would look so much more modern in white with a dark brown trim. 


Can we talk about how much I LOVE these windows and that beam that goes straight into the house?  I can't wait for the beam to be all one color inside and out.  It's going to look so great.
To start off this project I got as many ladders as I could find.  Seriously,  why are there 3 ladders here? I look like a crazy ladder hoarder.
Actually the only ladder in this photo that is mine is the dainty white one.  

How cute of me to think that would serve all my home painting and renovating needs!

  Luckily I moved in next to the greatest neighbors ever and they help me with my crazy projects and lend me ladders. In fact this place would still look exactly like this if it wasn't for the help of my handy neighbor Bill.  He managed to patch the stucco near the ground, spray wash the whole house and sand the trim down to its wood while I patched holes and spackled stucco and scraped peeling paint from under the eaves.

Scraping sucks. So so so much.  It feels like it will never end.
I almost lost my mind there for a minute and decided to give up.  Turns out I  was just hangry and tired so I made this, regrouped and got back to something so much more fun!...painting!
Look at that gorgeous "Swiss Coffee"?!  All of the sudden the frumpy little bungalow is starting to look like a pretty mid century modern.   So exciting!  Jiggity Jig!


Next weekend:  I will paint the trim "Weathered Brown" 


pretty right? 


yay more painting...

Saturday, June 15, 2013

My first Ikea hack

And I couldn't be more excited!  These are $40 simple twin beds from ikea 
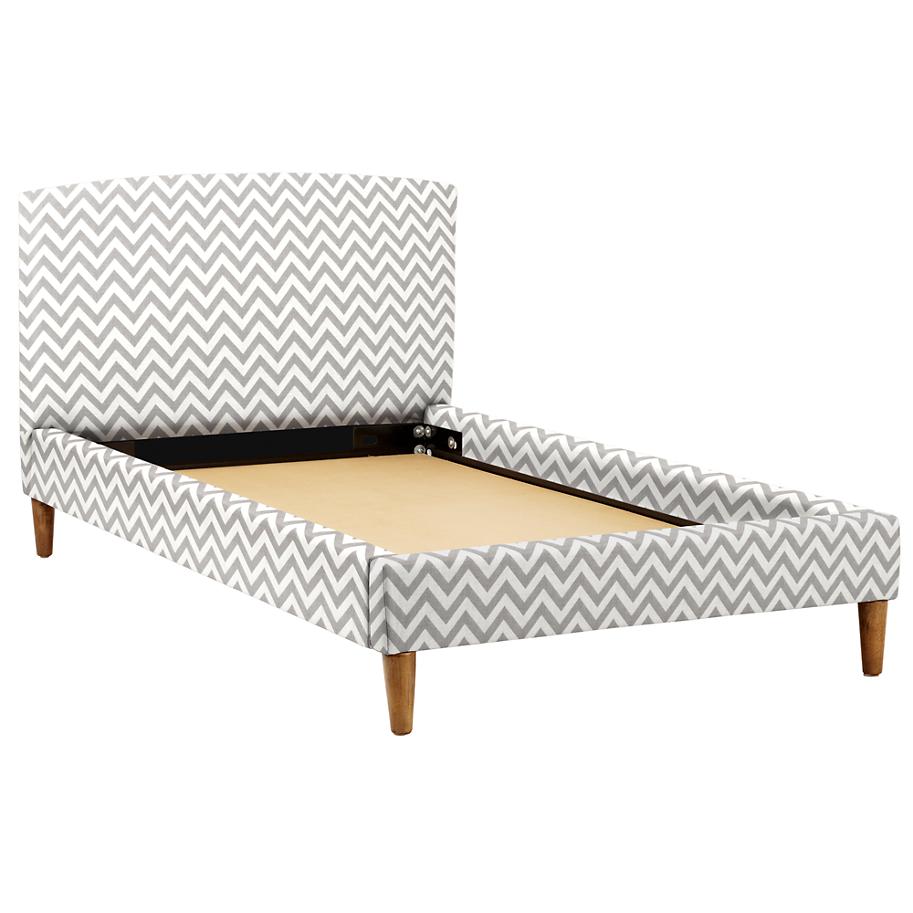
That I hacked and turned into these cuties!

My inspiration bed was this one from Land of Nod:


So cute! But so pricey...
I knew I could do something similar for a lot less money so I started researching on line.  Ultimately I got the idea from Manhattan Nest to use the Fjellse frame as a base.  I studied his tutorial and made a few minor changes.  One of which is I used a patterned fabric.  I don't really recommend this and will probably not be doing that when I tackle my own bed.  Matching patterns on the edges and corners and keeping the print level can be a challenge for a first project.  However, it does look cute so if you do go with a print, make sure to buy a bit of extra fabric just to be safe.  So here is how it all went down:


I bought a piece of plywood at Home Depot and had them cut it so that it was as wide as the heaboard but taller and screwed it into the front of the frame.  My goal was to have the top of the headboard be 44" (that is about a foot taller than the frame is originally).

Then I used scrap wood to frame out the sides and top so that it was all the same thickness all the way around the side of the headboard.


I cut off the part of the footboard that was higher than the rails to give the whole base of the beds a smooth edge

 
Then I wrapped batting around the rails and the headboard and stapled it into place with an electric staple gun.  Best $25 I ever spent.  I wouldnt try this with a manual staple gun.  As it was, my hands were sore.

I used 2 layers of batting on the rails.


And 3 layers on the headboard.  

I got 2 different bags of batting at Jo-Ann fabric with a coupon (I think one was king sized and the other was a queen and one was beefier than the other) and used the heavier one for the headboard and the lighter one on the rails.


After the batting I started on the fabric for the headboard and tried to line it up so the pattern was centered and level.  This took a couple of attempts and I had to un-staple and adjust it a few times before it looked decent (this is why you might want to consider using a solid fabric)


Also I stapled the top center and the bottom center and worked outwards from both sides.  Then I worked on the sides using the same system.  I stapled the centers and worked up to the top and then down to the base.  To do the corners I folded the fabric like I was wrapping a present and once I had a clean straight line stapled it down in the back.  The back of the headboard is unfinished with about 2 inches of fabric along the sides and I'm okay with that since it will be against the wall.  I think it would be super cute with a contrast fabric in the back at some point like hot pink and to do that I would cut a piece of thin board, wrap it in the fabric glue it down and either use nailheads to attach to the back or staple and add piping to disguise the staples... but that is a project for another day.
  

Anyway,  on to the rails.  Match the pattern so that it is continuous and matches all the way around the railing.  This is where the extra fabric comes in because there will be some waste.   I stapled the sides first then did the front in a separate piece folding in the edges so that there was a clean seam next to both legs.


And voila!  


Super cute little beds for my guests!  

The best part is it only cost me about $275 for both of them!